Introduction
Team2Book can act as a Work Schedule Management Software. This guide explains how to use the Special Events feature and how to use the Special Event Types Menu from the Client Dashboard.
In this section, you will be able to:
- Activate the Special Events
- Use the Special Event Types Menu from the Client Dashboard
- Add, Update, and Remove your special event type.
- Reserve a resource to a special event type.
- Enter a Special Events in Teamup Calendar (only Client Managers).
- See if the scheduling of Special Events is fair using the Statistic Module.
What are Special Events
A Special Event is when the client manager assigns a given consumer to a special shift (nights, weekends) or to a special resource (e.g. emergency room, emergency reception desk, etc.).
Usually, Client Managers assign consumers to special shifts after the consumers enter their availability/non-availability and before Team2Book starts assigning resources to consumers. You can take advantage of the Schedule Offset (From the Client Details Menu) to give you enough time to perform this task. No need to worry, Team2Book will always schedule the special shifts in priority over normal resources assignments. Therefore completing the special shifts assignments before the Schedule offset day is preferable but not mandatory.

Special Event Type Attributes
Special Event Type contains two attributes. Name, and Abbreviation of the special type.

Name
Name is the required field in the special event type table. You can assign a unique name of minimum 3 characters. The (Required) in front of the Name indicates that you must have to specify a name for your special event type.

Abbreviation
Abbreviation is a required field in the special event type table for the special event type name.. You can assign a unique, 2 – 5 characters are allowed. The abbreviation will be used on the titles of resource events in the Teamup calendar. . The (Required) in front of the Abbreviation indicates that you must have to specify a character to your special event type name.

Prerequisites to use the special events
A separate Teamup Calendar subscription is required to use Team2Book. Teamup Calendar subscription has 4 Subscription Plans. Special Events needs the Custom Fields feature of the Teamup Calendar. Therefore to use Special Events, you will require a Teamup Calendar Premium or Enterprise subscription plan.
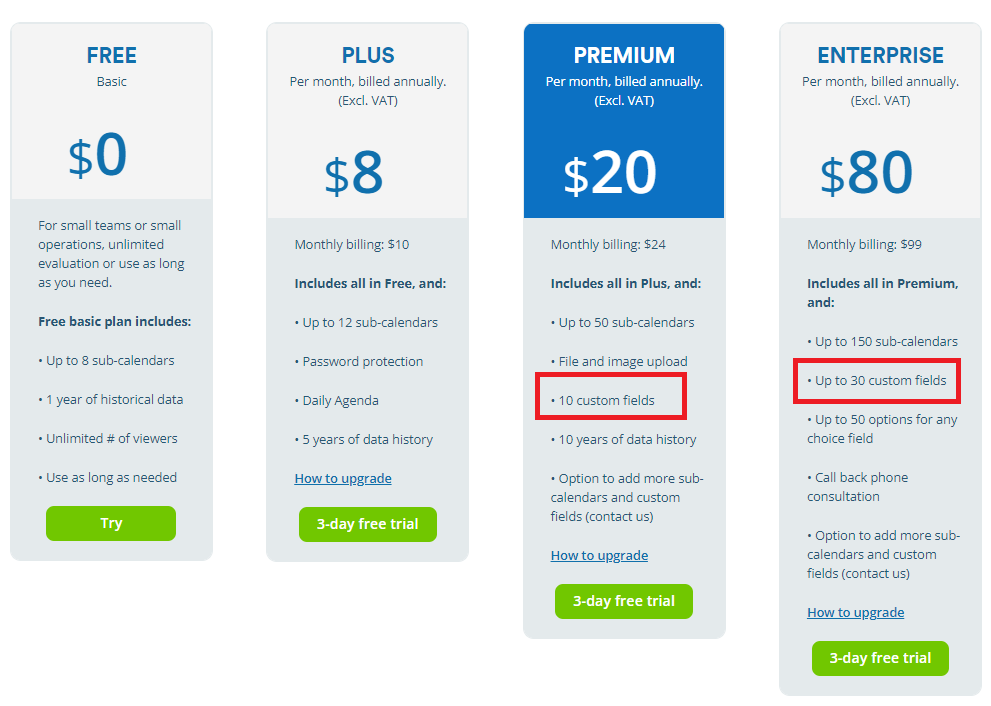
The only prerequisite to use and access the special event type features is upgrading the subscription plan to Premium or Enterprise Teamup Calendar subscription plan.

Team2Book reads the Teamup Calendar plan you have. Team2Book will allow you to activate the Special Events feature only if you have a monthly or annual Premium or Enterprise Teamup Calendar subscription.
Please note, you can use any of the Team2Book subscription plans.
How to Activate / Enable the Special Events
Please first read our Prerequisites to use the special events section above. To activate the special events and to show the special event types menu from the client dashboard, go to the client details section and enable it.
Here is to activate / Enable the Special Events
- Log into your client Manager Team2Book account
- From the Team2Book Main Menu, mouse over the Members Area.
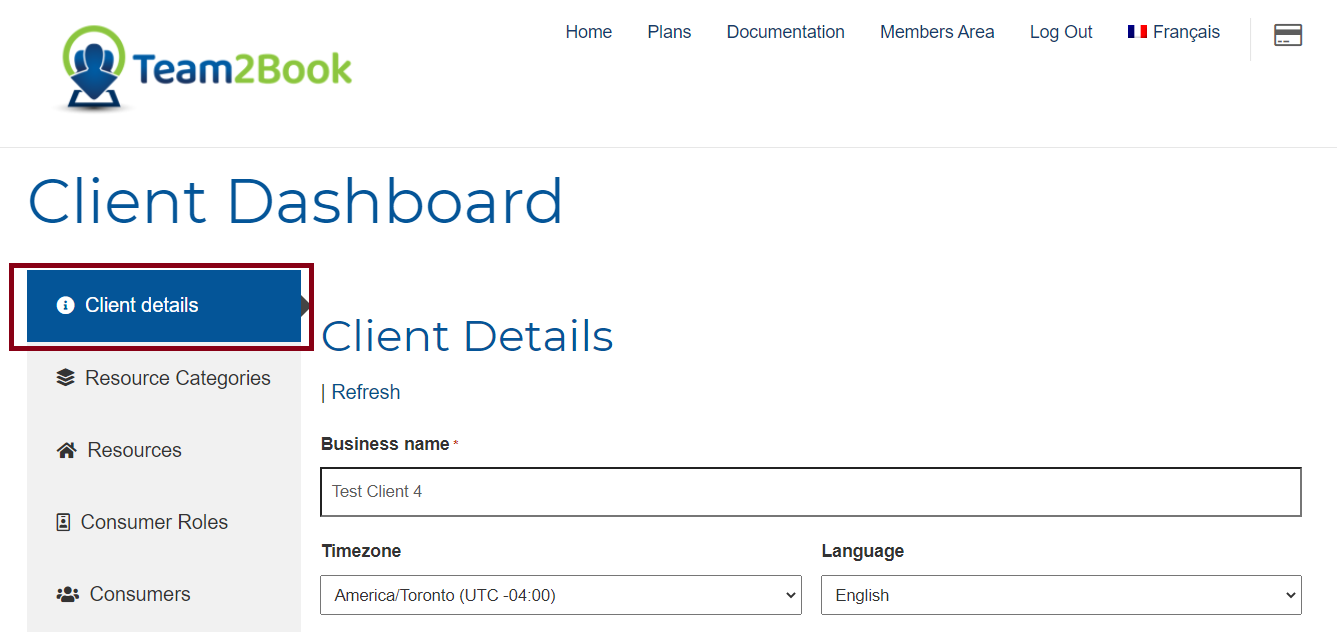
- Click Client Dashboard from the Members Area Menu.
- Click Client details from the left side menu. Scroll down to the special event section.
Here are the Fields of the Special Events section: Special Event, Schedule Special Events on Closed Days, Verify Consumers Availability On Closed Days, and Consumers That Can Be Assigned To Special Events.

- Under Special event, Click Enable

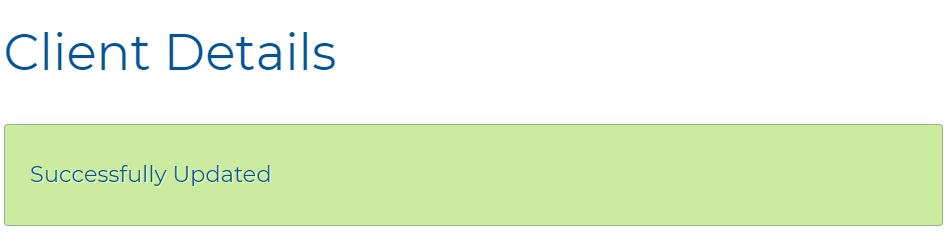
- Click Save

- You will get an update that you have updated successfully the client details.
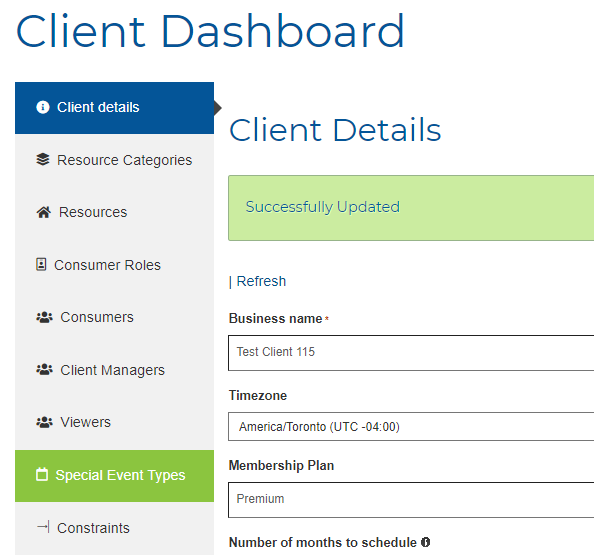
- Now Special Event Type menu will be displayed as a list in the Client Dashboard
You cannot see and use the special event type menu until you have Enabled Special Events from the Client Details. After activating the special event, you will be eligible to access and use the special event features.
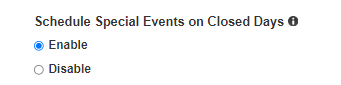
Schedule Special Events on Closed Days
The Team2Book scheduler will not schedule on closed days by default. Enable this to schedule special events on Closed Days. For example, if you enable this, you can schedule Special Events on Saturday and Sunday even if Saturdays and Sundays are usually set as closed days.

To enable and schedule special events on Closed Days
- Log into your client Manager Team2Book account
- From the Team2Book Main Menu, mouse over the Members Area.
- Click Client Dashboard from the Members Area Menu.
- Click Client details. This is where you will find the Fields for Special Events.
- Select Enable for the field Schedule Special Events on Closed Days.
- Click Save
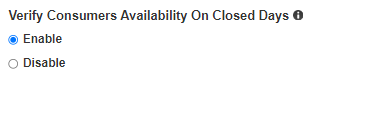
Verify Consumers Availability On Closed Days
Verify availability of consumers assigned to special events on closed days. If disabled, managers will not receive notifications related to unavailable consumers assigned to special events on closed days.
- Log into your client Manager Team2Book account
- From the Team2Book Main Menu, mouse over the Members Area.
- Click Client Dashboard from the Members Area Menu.
- Click Client details. This is where you will find the Fields for Special Events.
- Click Save
Consumers that Can Be Assigned to Special Events
The client managers can add or remove the list of consumers that can be assigned to special events.
The consumers listed here will be shown in the Teamup Calendar User Interface while assigning a special shift. Maintaining a short list of possibilities will make it easier to search a specific consumer from the Teamup Calendar User Interface and prevent errors.
For example, here is the list of consumers that can be assigned to special events. A client manager can add a specific consumer to this list by clicking the green plus sign and can remove a specific consumer by clicking the red minus sign.

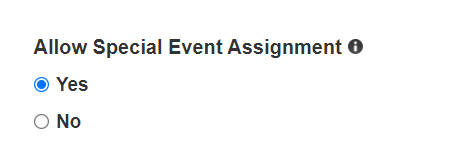
Alternatively, the client manager can add a given consumer to the list of Consumers That Can Be Assigned To Special Events by enabling the Allow Special Event Assignment options when adding a new consumer or when updating an existing consumer details.
How to use the Special Event Types Menu from the Client Dashboard
A special event type is a name given to a set of similar events. For example: Evenings, Weekend, Emergency are types of special events. These names will appear in the Teamup Calendar interface and in our statistics module.
Here is how to get to the Special Event Type Menu:
- Log into your client Manager Team2Book account
- From the Team2Book Main Menu, mouse over the Members Area.

- Click Client Dashboard from the Members Area Menu.
- Click Special Event Types from the left menu.

To Add a new Special Event Type
Here is how to add a new Special Event Type:
- Log into your client Manager Team2Book account
- From the Team2Book Main Menu, mouse over the Members Area.
- Click Client Dashboard from the Members Area Menu.
- Click Special Event Types from the left menu.
- Click Add new (top right section of the page)
- A new adding special event type page will pop-up

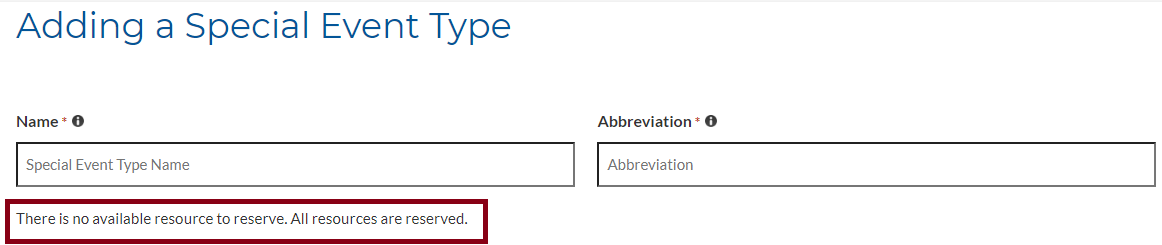
Both Name and Abbreviations are a required field to add a new special event type.
- Enter Name and Abbreviation.
- Decide if these special events require a specific resource. For example, the night shifts in a medical clinic might not require a specific resource. The Emergency Shifts or Weekends Shifts might require the Emergency Room Resource. With this example, you would create a Night Special Event Types and an Emergency Special Event Type.

The selector field Reserved resource lists the available resources not reserved by any priority 1 consumer or by other Special Event Types.
If there is no available resource to reserve, Team2Book notifies you that all resources are reserved.
- After making sure we have specified the required name and abbreviation to the special event type, and optionally selected a reserved resource, click the Submit button.


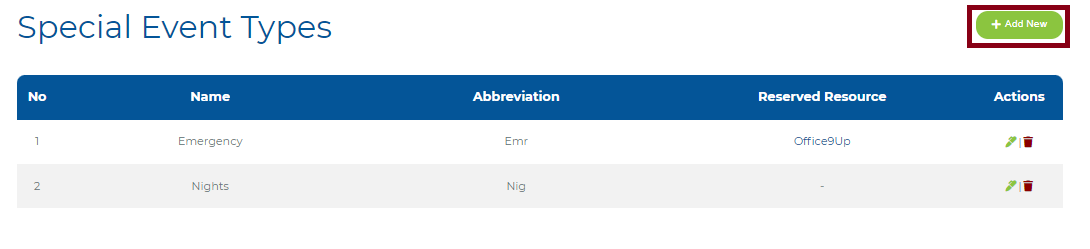
- The system will take you back to the special event type table, and you will get your newly added special event type with a message New Special Event Type Added Successfully.
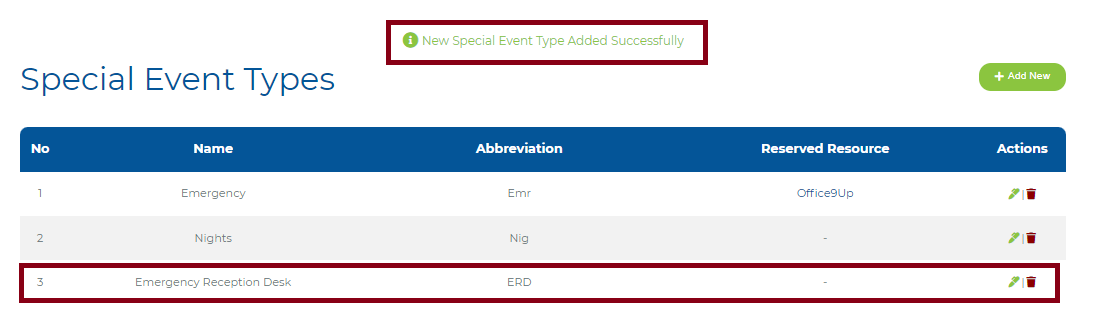
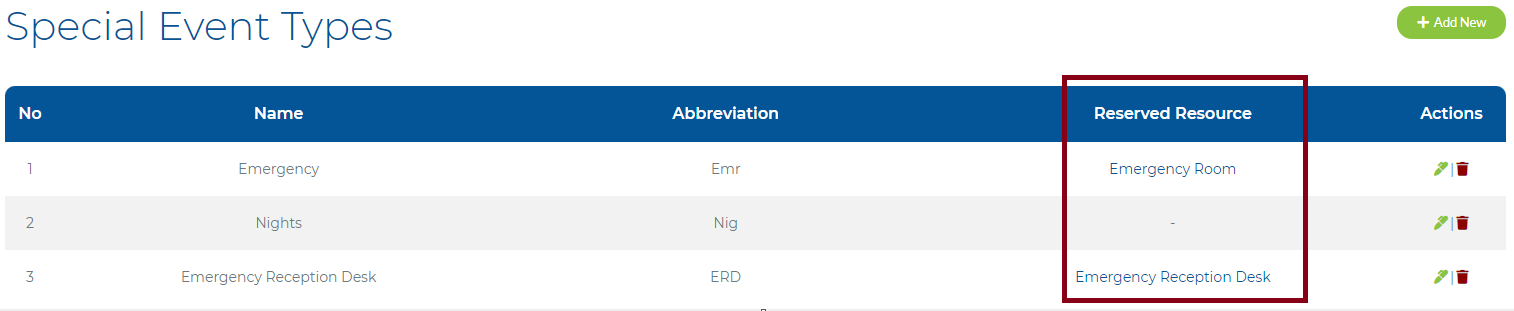
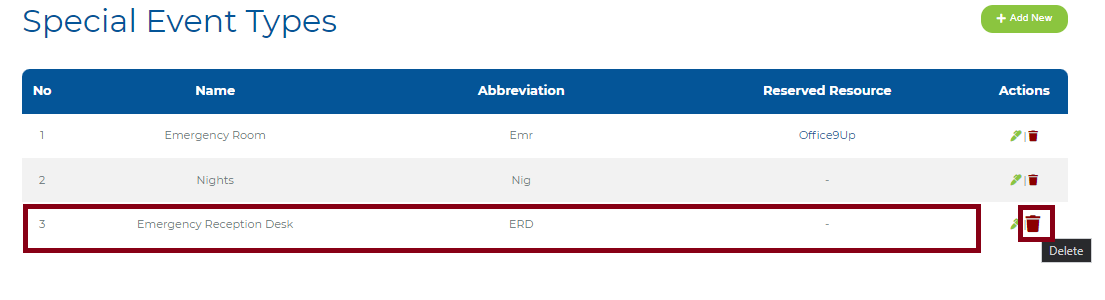
The Special Event Types table lists all the added Special Event Types. Under the column Reserved Resource, you can see if a special event type has a reserved resource. Currently, a given resource can only be assigned to one Special Event Type or one Priority 1 consumer.
To Update / Edit a Special Event Type
Here is how to Update/ Edit a new Special Event Type:
- Log into your client Manager Team2Book account
- From the Team2Book Main Menu, mouse over the Members Area.
- Click Client Dashboard from the Members Area Menu.
- Click Special Event Types from the left menu.
- Navigate to the Special Event Type Table
- Select the special event type, you want to update and click the edit / update button. When you mouse over in the right end of the selected special event type, and the cursor is in the edit/ update button update information will display. Click Update

- A new page will pop-up after clicking the Update button.
- You can edit or update the Name of your special event type the Abbreviation and the Reserved Resource on the basis of your needs.
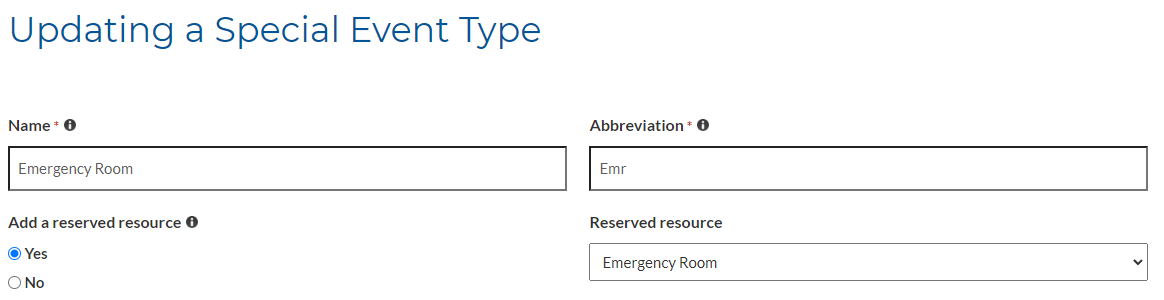
- After editing or updating the desired fields of the special event type, Click Submit.
- The system will take you back to the special event types table, and you will get an updated special event type with a message Special Event Type Updated Successfully.

To Remove / Delete a Special Event Type
Steps to remove or delete a special event type:
- Select the special event type, you want to remove or delete in the special event type table and click the Delete button. When you mouse over in the right end of the selected special event, and the cursor is over the remove / delete button Delete information will display.
- After clicking the remove / delete button, a new information page will pop-up.

- If you are sure to remove or delete the selected special event type, you can click the Yes button. If you’re not sure about the selected special event type you can cancel by clicking the X button in the new pop-up page and will return you to your special event types table.
- When you click the Yes button, the system automatically removes or deletes your special event type in the special event types table.
- You will get back to the special event types table with a message Special Event Type Deleted Successfully.

Special event type with or without a reserved resource and resource scheduling.
If the special event has a reserved resource the scheduler will assign the consumer on the reserved resource. If not it will assign the consumer based on default Consumers’ Resource Preferences.
For example the Night special event has a reserved resource called Emergency Room. The scheduler will assign a night special event assigned to the consumer to the reserved resource Emergency room.

The Weekends special event has no reserved resource, so the scheduler will assign the consumer based on default consumers resource preference.
Special Events have priority over Availability/Non-Availability normal events. If a client manager assigns an unavailable consumer to a special event, the consumer will still be assigned to this special event but the client manager will be notified. This way, the client manager can assign somebody else or ask the consumer to change its availability/non-availability sub-calendar accordingly.
Here is another example:
- E. Tamiru entered an availability for the whole day on November 2.
- The Client Manager as defined a Special Event Type called Emergency with the abbreviation emr. This Special Event Type has the reserved resourced Emergency Room
- The Client Manager assigned E. Tamiru to the special event Emergency on November 2 from 8:30 to 12:00

- The result, E. Tamiru is assigned to the Emergency Room from 8:30 to 12:00 then he is assigned to his preferred resource from 12:00 to the end of the day.

How to enter a Special Events in Teamup Calendar
Only the client manager can enter special events in the Teamup Calendar. The client manager can assign a specific consumer to a night or weekend shift etc. To proceed, the client manager will add a Teamup event using the Special Event Type, the date/time and the consumer to the special event sub-calendar.
Here is how to Enter a Special Event Type into Teamup Calendar:
- Log into your client Manager Team2Book account
- From the Team2Book Main Menu, mouse over the Members Area.
- Click Client Dashboard from the Members Area Menu.
- Click Scheduler from the left side menu. This is where you look at the Teamup Calendar.
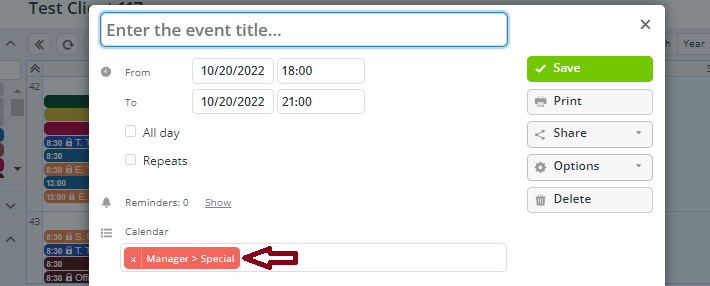
- Click on a desired date from the calendar view.
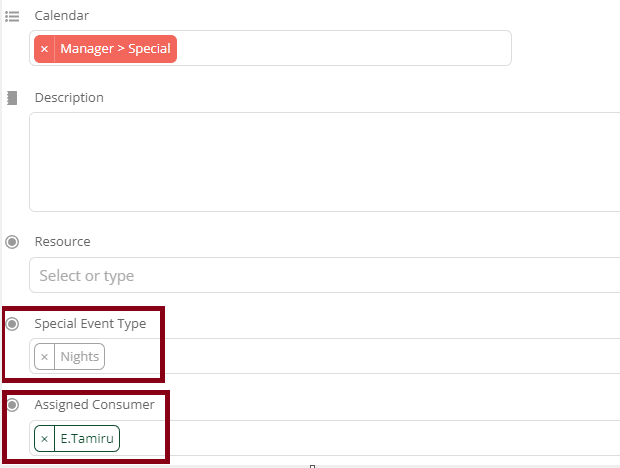
- Select special event sub-calendar (Called Manager > Special).

- From the Special Event Type custom field, choose a special event type

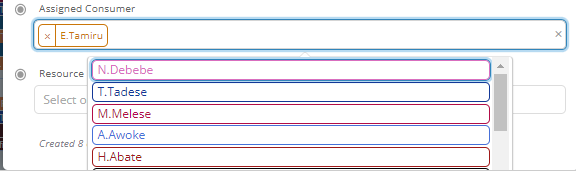
- From the Assigned Consumer custom field, select a consumer to be assigned for the special event type.
- Adjust the date and time for the event.

- Click Save
Based on the above example, The scheduler will assign E. Tamiru to the Night special event. If the special event type Night has a reserved resource, E. Tamiru will work/use that resource.
Note: With some advanced configuration, you may see another custom field name Resource. You can ignore this custom field when assigning a special event to a consumer.
The Notification the Client Managers will receive if an assigned resource is not available.
A notification will be sent to the client managers and the scheduling issues also displayed at the bottom of the scheduler calendar tab. Client managers will receive notification emails when they assign an event to an unavailable consumer and when no more resource is available to be assigned for a special event.

Special events assigned to unavailable consumers can be found for the following events: scheduling error will also be displayed on the bottom of the scheduler calendar on the client dashboard scheduler menu until the necessary corrections to the calendars are taken.

How to see if the scheduling of Special Events is fair using the Statistic Module.
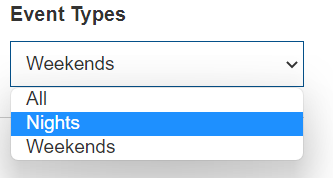
By varying the Event Type data filter section, the client managers can see the distributions of the special event type among the consumers.

The statistical pie chart shows how the special event is divided among consumers as a circle (the namesake pie) divided into the number of workdays for each consumer. Here, the term “pie” represents the whole special event type, and the “slices” represent the parts of the number of workdays for each consumer.
You can change the range of the statistics using the top filters.

From the Example above, we can see that A.Auger (dark green) is working a total of 3 nights in October 2022. C.Bouthillier (yellow) is working 1 night.
Based on past statistics, you can better distribute the special event type for the next period.