Client Details Module
Introductions
This module is used to define specific details about your organization (Name, Timezone, Opening and Closing times, etc). This is also where you enabled some of the optional features and options (Special events, Mixed Sub-calendar, Resources Booking, Linked Consumers, etc.). Finally, in this module, you will define when notifications are sent and when scheduling is done.
In this section, you will be able to:
- modify your business information.
- configure when notifications are sent
- configure when scheduling is done
- enable special events and other special options.
Here is how to get to the Client Details menu:
- Log into your client Manager Team2Book account
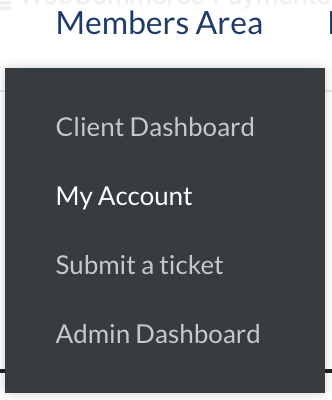
- In the homepage of Team2Book, tab the Members Area.
- Click the Client Dashboard in the Members Area menu.

- Click Client details from the left side menu.

Client Details Attributes
The client detail dashboard contains:
Business name
Business name is required field in the client detail dashboard. A business name is the name a business is known by.

The business name can be changed at any time. The name you enter here is also displayed in the Teamup’s user interface.

Timezone and Language
Team2Book allows clients to select their local time zone. To change the timezone for your purpose, go to your client detail > Timezone and select your preferred time zone.

Timezone changed in Team2Book is reflected in Teamup.
Language
Currently Team2Book offers two language preferences for clients. Team2Book accommodates changes to your layout when a client switches from English to French language, and vice versa.
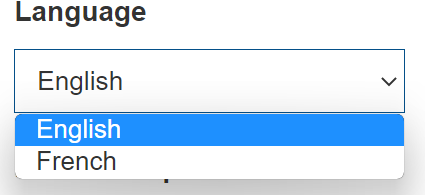
Changing your language will be reflected in the Teamup’s user interface.
Membership Plan and Status
This lists your Team2Book membership plan and status.

Membership status is active if a client has a current membership plan. When a renewing payment fails or if the membership is canceled the status becomes inactive. An inactive member can reactivate an expired membership from the ‘My Account’ page.
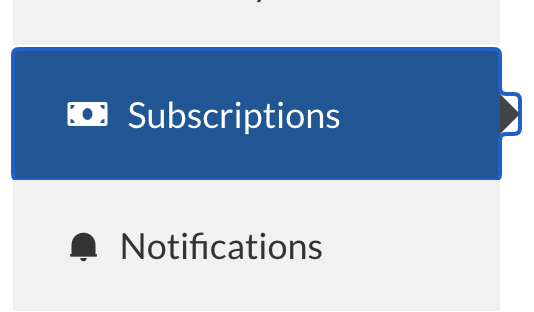
A separate Teamup Calendar subscription is required to use Team2Book. You can get more details about your current Team2Book and Teamup subscriptions from the Subscriptions Module of the Client Dashboard.
Number of months to schedule
Number of months to schedule refers to the number of months to schedule at a time. This is the number of months resources will be assigned to consumers.
The number of months to schedule can be set by entering a number manually or by clicking the arrow up/down.

The initial default value is 3 and the maximum value is 12.
Example
If the current date is in January after the schedule offset, and the ‘Number of months to Schedule’ is 3, the scheduler will assign resources for the month of January (current month), February and March for a total of 3 months.
Schedule offset
The Schedule offset is the amount of time, in days, you give your team to enter their availability or non-availability in Teamup. You can also use this time to assign special events. The Schedule offset should be after the ‘Reminder Notification Day’. The Team2Book Scheduler will only start scheduling the last month the day after the schedule offset.

For example, given the following value:

Number of month to schedule : 3
Schedule offset: 7
Notification Day: 3
Reminder Notification Day: 5
Current month: January.
Results:
- A notification will be sent to the consumers on January 3 to ask them to enter their availability or non availability for the month of March (i.e the last month of the number of months to schedule).
- A reminder notification will be sent to the consumers on January 5 to enter their availability/non-availability for the month of March.
- Before January 8 (i.e. before the end of the Schedule offset), the scheduler assigns resources to consumers for the month of January and February. Starting on January 8 (i.e. the day after the Schedule offset), the Team2Book scheduler will start assigning resources to consumers for the month of January, February and March.
Notification Day
The purpose of Day of a month notification in the systems is to generate and send timely email messages to the consumers before the scheduler schedules for the next round. The notification will alert consumers to fill their availability/non-availability calendar. It can be sent at the scheduled specified day of the month from the Notification Day of the Client Dashboard.
You can set the day of the month to send notification emails to your consumers. By default, the system will send the notification on the first day of the month.

Reminder Notification Day
Team2Book will send automated reminder day notifications to consumers to enter their availability or non-availability in their TeamUp Calendar for a specific month.
It can be sent at the scheduled specified day of the month from the Reminder Notifications Day attribute of the Client Dashboard.

You can set the day of the month to send notification reminder emails to your consumer. By default, the system will send on the fifth day of the month to notify them about the remaining days to enter their availability or non-availability in their Teamup Sub-Calendar for a specific month.
The input number should be greater for Schedule offset than for the notification day and reminder notification day. And the input number should be greater for reminder notification day than for notification day. Because the reminder notification day should be after the notification day. And the Schedule offset should be after the reminder notification day. If these rules are not met, you will see errors while submitting your form.
For example, if we set the schedule offset to 07, the notification day to 09, and reminder notification day to 05. There will be a problem.

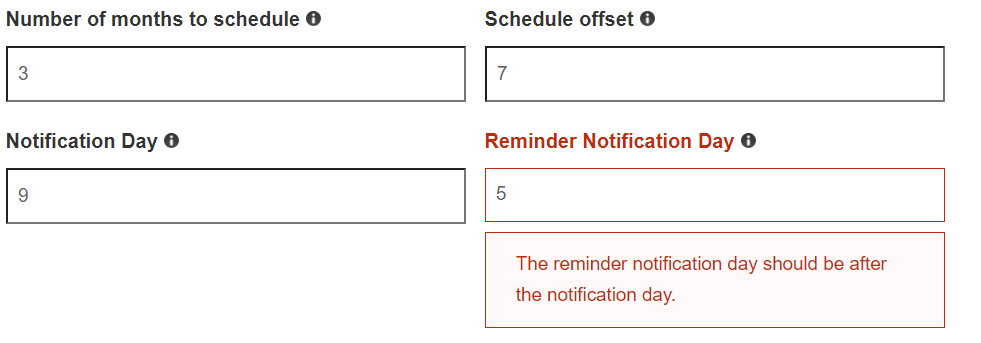
The notification day should be before the reminder notification day, and the schedule offset day must be after the notification and reminder notification day.
Number of Days to Freeze Resource Events
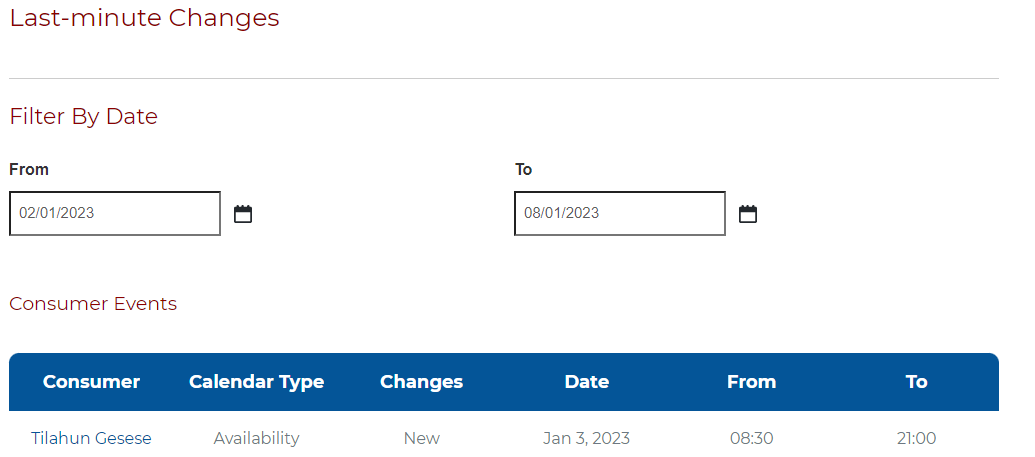
If a last-minute change is made to the event in the scheduler, it can have a ripple effect on the entire team’s schedule. This can mean that another consumer loses its assigned resource or a constraint becomes violated.
The Number of days to freeze resource event attributes is used to prevent last-minute changes. By default the value of the number of days to freeze resource events is 0. Setting this value to 0 means last-minute changes are accepted.
If clients want to allow consumers to change their calendar at the last minute, a client can set the value of the number of days to freeze to 0, and the scheduler will accept a last minute change.

Setting the value of the number of days to freeze resource events other than 0 will prevent last minute changes. E.g. Setting this value to 7 will prevent any modification to the event scheduling for the next 7 days starting with today. Even if consumers change their availability or non-availability for the upcoming few days, the resource assignments is frozen for the next 7 days.

In Team2book, the number of days to freeze is simply a time period when you can’t make any changes to the schedule.
For example, if we set the Number of Days to Freeze Resource Events to 5, and after making a change to a consumer availability, let’s run the scheduler.

The last minute change will reflect on the scheduling problem list under the scheduler dashboard, however the calendar doesn’t change. A notification will also be sent to the client manager. This way the client manager will be informed of the desired changes (and can take manual action) but the resource assignment will not change in Teamup.


Free Resources and Booking
This feature is intended to show all the unused resources so that a consumer can book a specific resource at the last minute without disturbing the assignment of the other team members.
For example, at the last minute, a consumer can see that there are free resources available tomorrow and decide to reserve one specific free resource at the last minute to come and do paperwork.

Enable and Save this to show free resources on a separate sub-calendar and allow consumers to reserve resources using their availability sub-calendar.
Show Free Resources
Free resource and booking attribute helps to show free available resources.
This allows the client to get a list of free resources when they Enable the free resource and booking attributes and when they are clicking the Free Resource sub calendar under the scheduler manager section.

Free Resource Booking
The scheduler schedules the available resources based on the consumer priority and preferences.
By enabling the free resource and booking attribute, you now allow consumers to reserve a specific free resource using their availability or non-availability sub-calendar.
To book the free available resource:
- Go to Teamup and click on the Free Resource sub-calendar to see which resources are free for a given day.
- Enter an event in Teamup using your availability or non-availability sub-calendar. Select the free resource in the Resource custom field.

Enable Mixed Sub-calendar
Team2Book Calendar type has Availability and Non-availability calendar options. For consumers working most of the time, it might be more convenient to enter non-availability in their Teamup sub-calendar (e.g. the days they are not working). For consumers present only a few days a week, it might be more convenient to enter Availability (e.g. days present at the office). In the Mixed sub-calendar attribute, consumers can enter both their availability and non-availability calendar.
When using a Mixed sub-calendar, the consumer will need to specify the event type every time they create an event. There is no implicit availability or non-availability in a mixed sub-calendar.
Because if this requires an extra step, we recommend that you assign a mixed sub-calendar to consumers that really need to enter both, availability AND non-availability. For example, a doctor may need to first enter non-availability for walk-in clinics and availability for regular work schedule.

Enable and Save this to allow consumers to enter both availability and non-availability events. A mixed sub-calendar accepts both availability and non-availability events.
When we Enable Mixed sub-calendar, a separate sub-calendar will be available under the Teamup Calendar Hierarchy.

When we want to assign a resource to a mixed sub-calendar consumer, we have to select the consumer availability or non-availability calendar in the custom Event type field.
The green checkmark or the green X icon will be shown in the event. This will help to quickly identify the event type from the Teamup calendar view.

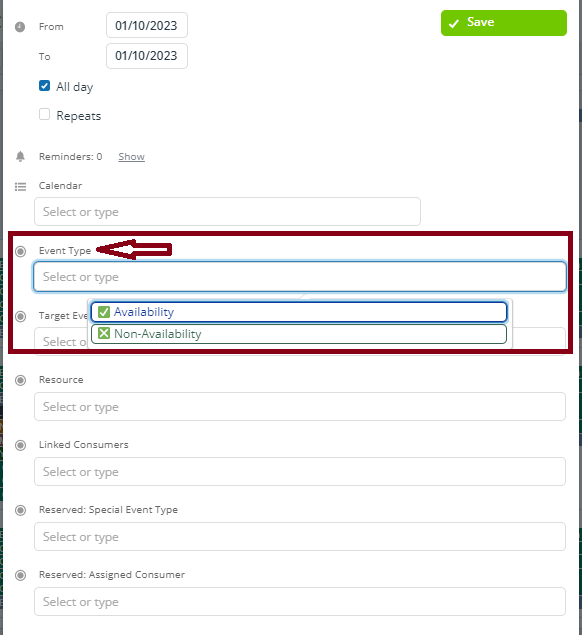
Enable Targeting Events
Target Events can be either regular or special. Targeting Events classify events as regular, special, or both.
The goal of targeting events is to allow additional flexibility. A consumer can enter an availability or a non-availability and indicate that this event only applies to regular events, or only to special events or to both.
For example, following a week working at the hospital, a doctor might want to work at the clinic the next day but specify that he/she is only available for regular work schedule and not available for walk-in clinics (special event). Using the target event, the doctor can specify this scenario.
Enable and Save this to allow consumers to target their availability or non-availabilities (Regular or Special).
When we select Yes in the allowed Enable Targeting Events, we are now enabling this feature.

For example, you may want to assign a specific consumer to a Regular or Special shift. To proceed, the client manager will enable and save targeting event attributes in the client detail dashboard, then the client will go to Teamup Calendar View to create an event. The client will assign the consumer to the targeting event by clicking the target event custom field.

In the Teamup Calendar View, the word ‘Regular’ or ‘Special’ or ‘All’ will now be shown.
Note: When ‘Enable Targeting Events’ is set to Yes and the target event custom field is left blank, then the target event is implicit to All (i.e. special and regular).
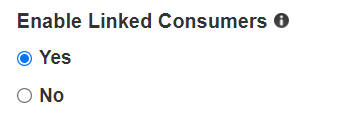
Enable Linked Consumers
Linked events allow multiple consumers to be assigned at the same time. This feature is handy, in scenarios like, the simultaneous assignment of some consumers are necessary. Let’s say Consumer A wants to be assigned every Monday morning from 08:30 – 12:30 if and only if his/her colleagues, Consumer B & C can be assigned too.
The conditions for Linked consumers to be assigned resources by the scheduler are:
- A linked event is scheduled if all the linked consumers are available and there are enough available resources.
- A consumer with priority 1 and Non-availability sub-calendar neither can add linked events nor can be linked by other consumers. However, a consumer with Non-availability sub-calendar and priority > 1 can add linked events.
- A consumer can add a maximum of two linked events on the same day. Each linked event can have different linked consumers. Hence, a consumer can add a linked event in the morning with Consumer B & C, and another linked event in the afternoon with different consumers. However, if these linked events are overlapping, there will be no adjustment and it could result un expected outcome.
- If a priority (1) consumer with availability or mixed sub-calendar type wants to be linked by other consumers on a specific time, he/she should not add availability events on that specific time.
Enable and Save this to allow a consumer to link other consumers to his/her availability event. Resources of linked consumers are scheduled simultaneously on each linked event.
Note: Linked events are scheduled only if each linked consumer is available and if there are enough available resources.
Linked events are scheduled after special events and regular shifts with priority 1 are scheduled. Linked events are scheduled based on the priority of the assigning consumer.
Only 1 of the linked consumers needs to create the linked event. To do so, the assigner consumer will sue the ‘Lineed Consumers’ custom field while creating the event.
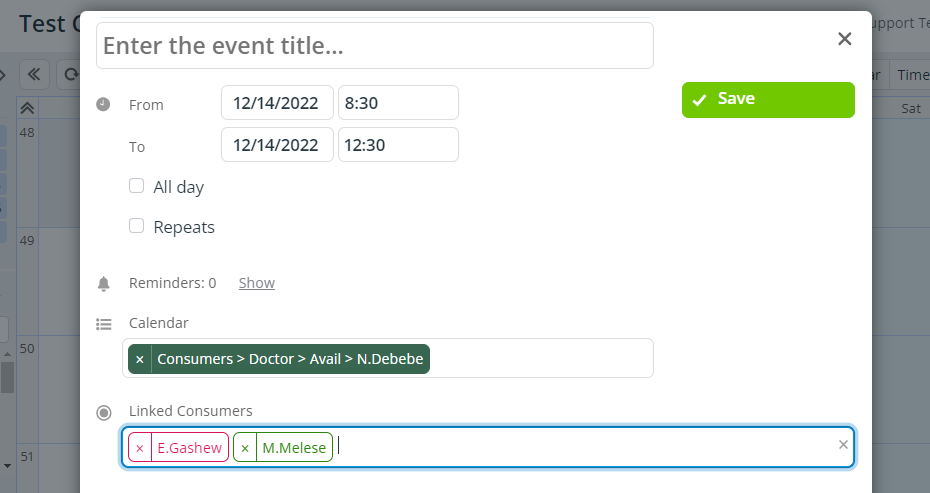
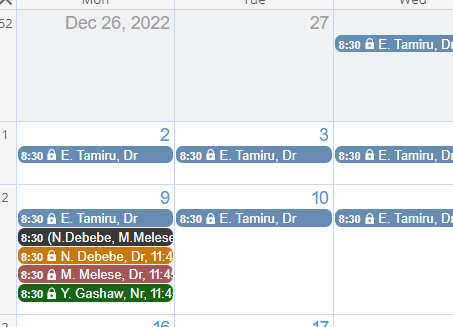
If all the linked consumers are available on 12/14/2022 from 08:30 – 12:30, and there are enough available resources for each linked consumer, the scheduler will assign resources to the three consumers simultaneously based on their resource preferences or reserved resources.
Consumers That Can Be Assigned To Linked Events
Once linked consumers are enabled, Consumers that can be assigned to linked events will be displayed in the client detail dashboard. Consumers can add linked events in their availability/non-availability sub-calendars. Linked events are similar to the regular availability events.
Use the + and – buttons to assign and remove consumers to linked events respectively.
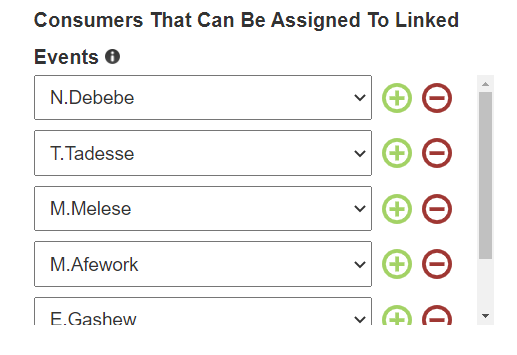
The only difference is the linked consumers in the linked events, Linked consumers are specified in the linked events using the ‘Linked Consumers’ custom field.
Special Events
The Special Event Types Menu, located in the Client Dashboard, provides a variety of functions specific to managing these events. By enabling the special event attribute Clients manager can assign a consumer to a special shift like night shift or emergency clinic shift. The Special Events feature in the client detail dashboard allows clients to create special events and assign the event to the consumers.
Using the Special Event Types Menu, clients can access four main tabs: 1) Schedule Special Events on Closed Days, 2) Verify Consumers Availability On Closed Days, 3) Additional Months To Schedule Special Events, and 4) Consumers That Can Be Assigned To Special Events.

You can enable special events using the Special Event field. This will add a new special sub-calendar in Teamup. This is where client managers can add new events or edit existing ones. Client managers will also find options in the client Dashboard under section Special Event Types.
The Schedule Special Events on Closed Days allows the scheduler to schedule special events on closed days. With this feature you can schedule special events even on business closed days.
By enabling Verify Consumers Availability On Closed Days clients can Verify availability of consumers assigned to special events on closed days. If disabled, managers will not receive notifications related to unavailable consumers assigned to special events on closed days.
Using Consumers That Can Be Assigned To Special Events option, clients can add / remove consumers that can be assigned to special events.
Using the Additional Months To Schedule Special Events option, clients can specify the number of additional months to assign and schedule only special events.
For more about the special event dashboard, please refer to the special event module.
Closed Days
The closing days in a client details dashboard may vary depending on the type of the client organizations. Generally, the scheduler will not assign resources to consumers on closed days. Therefore, the consumers don’t have to specify their availability or non-availability on closed days. Common closing days are weekends.
Client’s can mark by clicking the closing day and Save. For example, if a client wants to stop scheduling on Weekends, they can click Saturday and Sunday, and Save the information. Based on the closing day setted here, the scheduler will stop the schedule on Weekends.

The Closed Days section of the Client Details Dashboard allows the organization to specify the regular closed days.
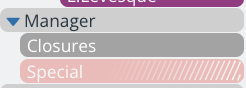
In addition to the regular closed days, the client manager can add specific closed dates using the Manager->Closures sub-calendar.
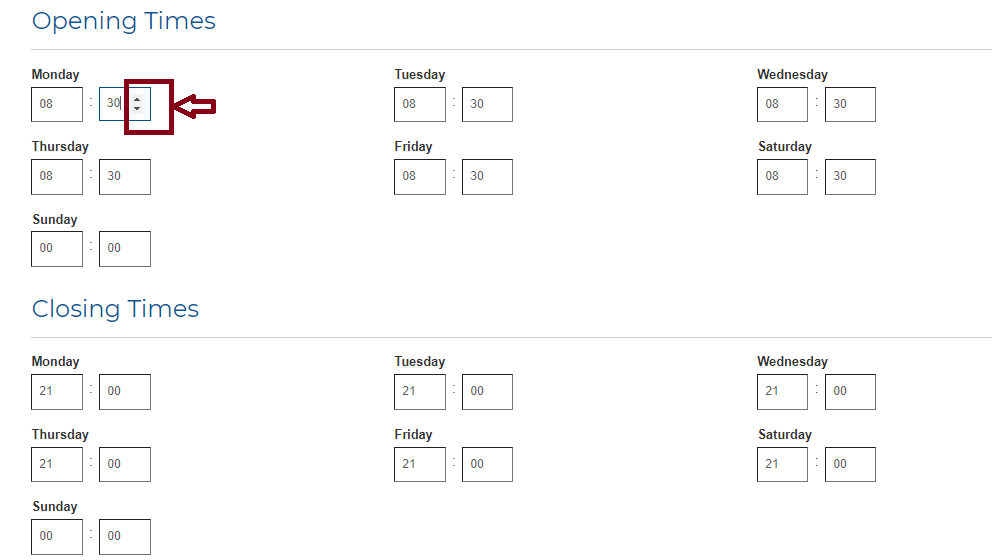
Opening and Closing Times
A typical full day in Team2Book Scheduler would involve the following shift: From opening time to closing time. Team2Book scheduler configured to have an adjustable opening and closing time. Generally, the opening and closing times will depend on the particular business hours of the organization using the scheduler. Clients may designate specific times that they’ll be open and closed. A consumer creating an ‘All-Day’ event in Teamup will be considered available or non-available from the start time to the end time.
Additionally, each resource may have its own set of opening and closing times. For example, a computer lab might only be available in the afternoon on Wednesday even if the school is open all day.
You can enter the time directly or use the up and down arrows.
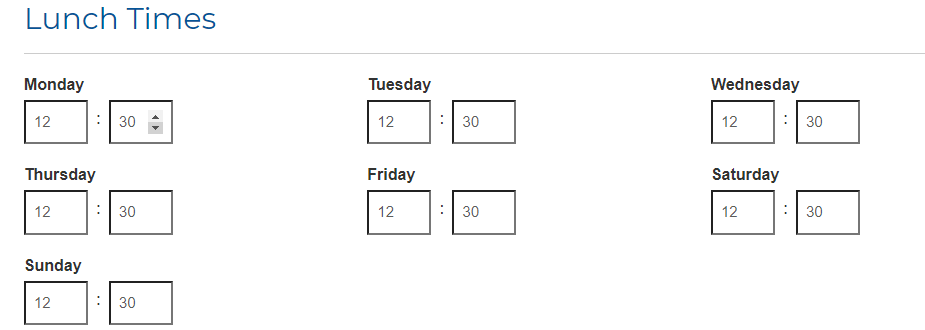
Lunch Times
The organization lunch time is the general time where we split morning and afternoon shifts. This is not each consumer’s lunch time which may vary.
The lunch times is used for:
- Event splitting.
- Mornings or Afternoons constraints check.
From the consumer module of the client dashboard, we can allow events, of each consumer, to be splitted.

When there is no resource left for a given consumer event on a given day, the scheduler shall try to fit the consumer event by splitting it in half. As a client manager you can configure the split time (i.e. the lunch time). The event will be splitted into two. i.e before lunchtime and after lunch time (morning and afternoon time). The scheduler only tries to split consumer events that can be split. The scheduler tries to find time availability for the 2 halves of the consumer event.
However, clients can vary lunch time frames to better accommodate their consumer and resource availability schedules and needs.
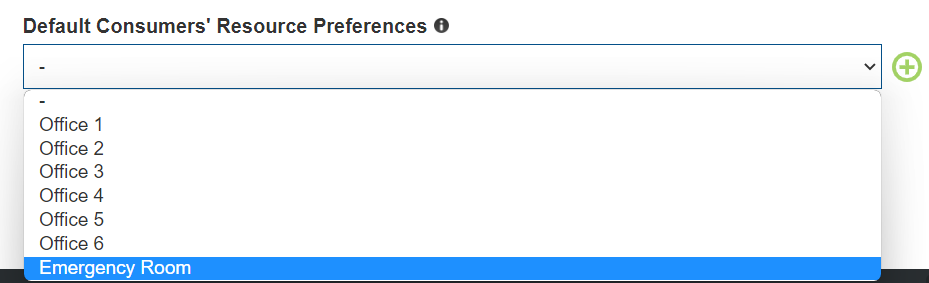
Default Consumers’ Resource Preferences
The Default Consumers’ Resource Preferences will be used as default resource preference for each new consumer the client manager adds.. You can add using + sign default consumers’ resource preferences.
In Summary
The client details module of the client dashboard allows the client to easily review current global settings. It displays the number of months to schedule, as well as when notification and reminder notification are sent for the next month This modules allow the client to enable or disable some optional features like Mixed Sub-calendar, Targeting Events, Linked Consumers, Free Resources and Booking and special events. Finally, It has closing days, opening and closing time, lunch time and Default Consumers’ Resource Preferences that can be added by client.
Once you have updated the client dashboard attributes, it’s important to remember to save the changes made by clicking the blue “Save” button at the bottom of the page or you won’t see the modifications reflected in your schedule.